- Upgrade
- Posted
Wicklow step-by-step retrofit reveals new way to go passive
This pioneering deep energy upgrade of a 1960s home in Wicklow will take place in phases over at least five years, with the aim of making it more affordable to go passive by renovating on a step-by-step basis.
Click here for project specs and suppliers
This article was originally published in issue 16 of Passive House Plus magazine. Want immediate access to all back issues and exclusive extra content? Click here to subscribe for as little as €10, or click here to receive the next issue free of charge
The most daunting aspect of any building project is always going to be the cost. Deep retrofits, designed to transform the comfort and thermal profile of a building, don’t come cheap. One solution is to stagger the work, to create a long-term plan in which that transformation is phased over ten, fifteen, even twenty years.
That’s exactly what Mariana Moreira and Art McCormack did when they set out to retrofit their 1960s built/1990s refurbished family home — dubbed Stella Maris — on an exposed hillside in Co. Wicklow.
It’s fair to say the couple have passive house running through their veins. McCormack is a co-founder of passive house architects and consultants MosArt and the Passive House Academy. Moreira and McCormack – both of whom are architects and certified passive house designers – both work for the two organisations, and therefore knew that an exposed location doesn’t have to mean a cold house.
“I can see the north pole from here,” says McCormack, “or at least that’s what it feels like when the wind blows from the north and from the east off the sea.” The wind whistling through the house – carrying all the heat away with it – was what prompted the need for the retrofit in the first place.
Adopting a phased approach was all about making the works affordable. And, as Moreira points out, by front-loading the work that will deliver the highest energy savings, those reduced running costs free up resources that can go towards future works.
The project – which will aim for the passive house retrofit standard, Enerphit – is a participating project in the Passive House Institute’s (PHI) Europhit programme, which supports step-by-step Enerphit projects.
Europhit has also produced a brochure that highlights its successes and showcases a series of demonstration projects (including Stella Maris) underway in 11 EU member states.
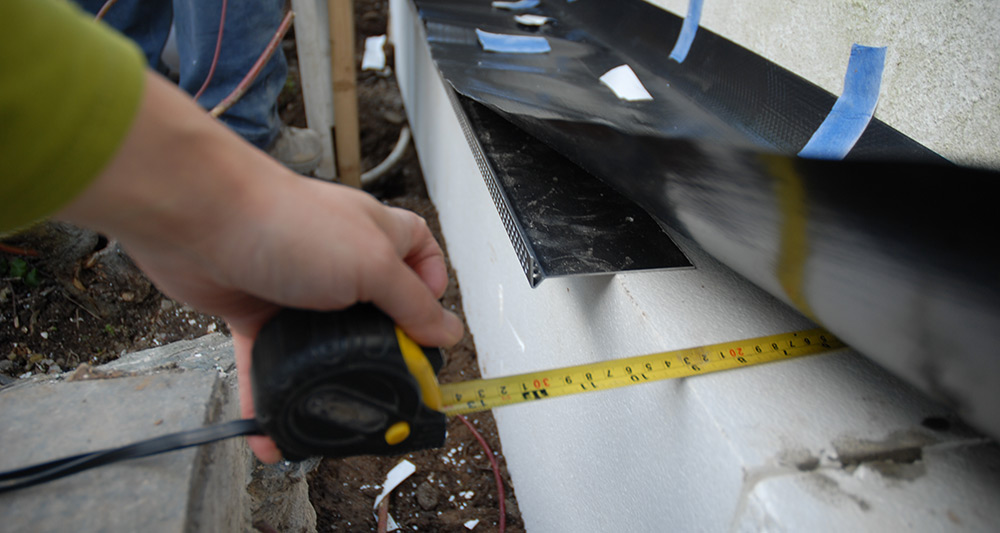
An improvised starter rail of flexible DPC fixed to the wall and metal rail pushed further out was deployed to reduce thermal bridging
“It’s estimated that 80% of retrofits in Germany are completed on a phased basis,” says Moreira, “so there is a need to develop a good strategy showing how to do this in a proper way and in a cost-effective, energy efficient and technically feasible manner.”
To that end, developing — at the outset — a thoroughly detailed plan which specifies the full scope of the works across all phases is vital.
At Stella Maris, McCormack and Moreira have planned three phases. The first, completed last November, centred on retrofitting the roof and northern elevation. The second phase, due this summer, comprises mainly internal works, and includes the replacement of the original open fire with a wood burning stove. The final phase — planned but not yet scheduled — will see the completion of the remaining elevations together with a ‘modest’ extension facing south in the central portion of both floors.
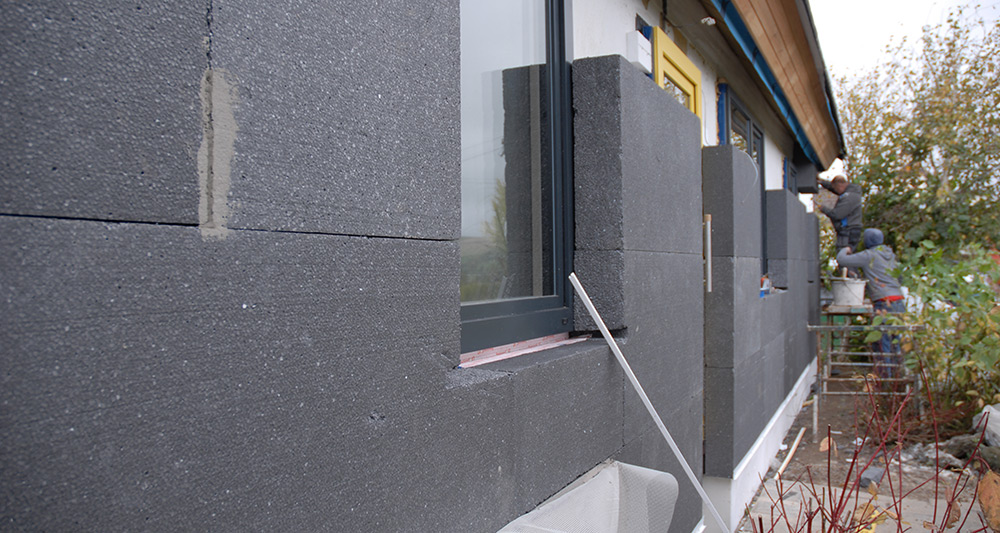
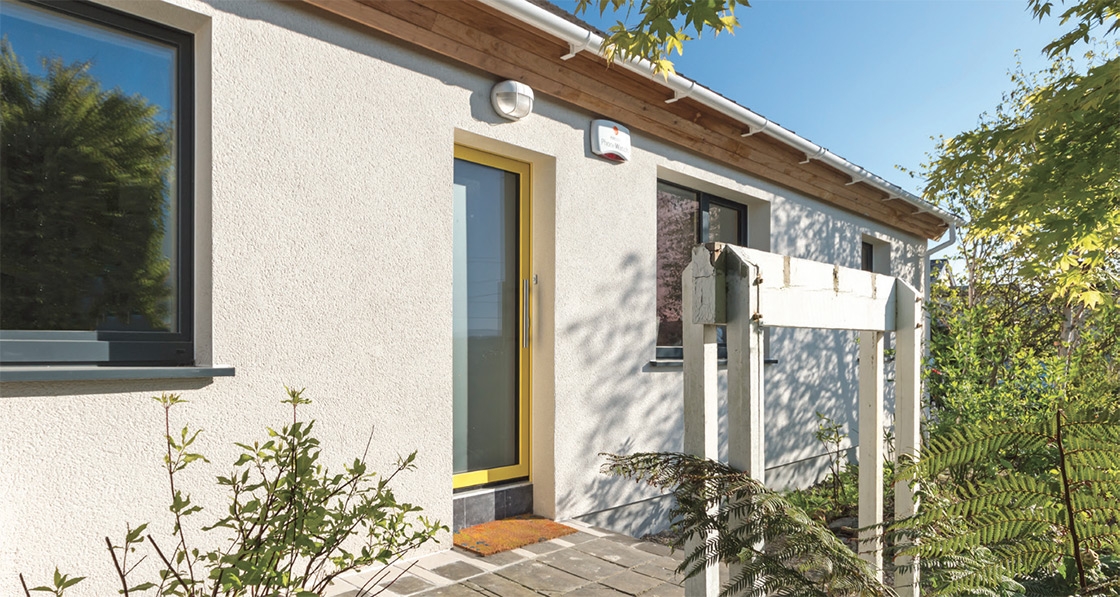
As part of the first phase of refurbishment, the front of the house was insulated externally with 250mm platinum EPS insulation with a Parex Lanko silica render finish
Phasing works throws up a variety of issues that don’t arise in one-fell-swoop retrofits. At what point do you think about ventilation for example? If airtightness is to be improved, a ventilation strategy needs to be put in place, but does it need to be implemented in the first phase, second or the third phase?
“The owner must have consultant expertise behind him to guide him through the process,” says Moreira, who adds that the Europhit project also provides the much-needed guidance and theoretical rigour to support step-by-step plans.
“If you’re going to retrofit your house starting today and you gave yourself four months to do so,” says McCormack, “it doesn’t matter if there are bits and pieces sticking out here and there. At the end of the project, everything is tidied up and you get the continuity, but when you have to pause for five, ten or fifteen years between steps, then you have to anticipate unbroken continuity in insulation and airtightness, and consider how that will be achieved.”
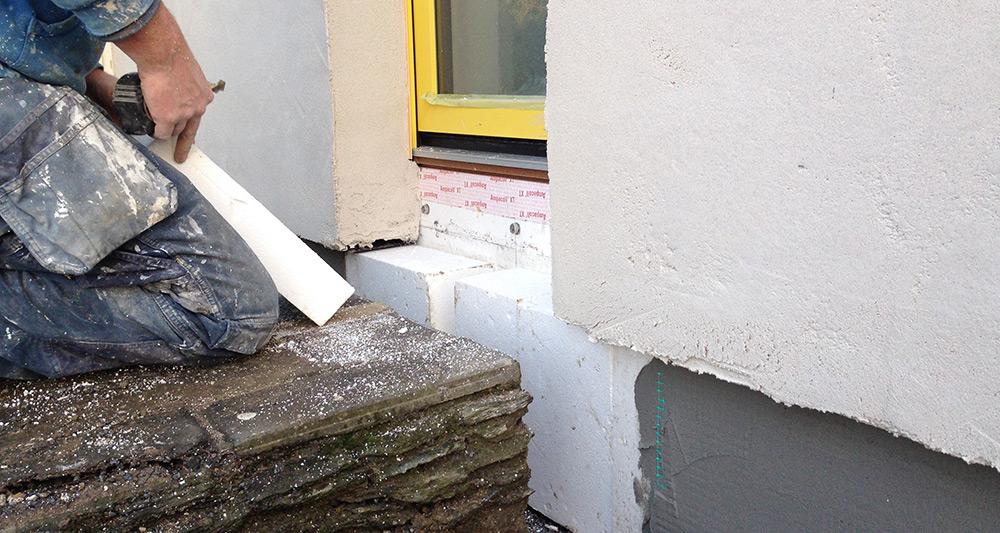
Compacfoam was installed at door threshold to combine insulation and structural needs
A close look at Stella Maris reveals how the completed first phase anticipates the work to come. The orientation of the house presented something of a challenge. Views of the sea and mountains lie to the north, while the southern aspect looks immediately to the upward slope of a planted hill. Moreover, the house itself stands at quite a high altitude, putting it, as McCormack points out, in the direct line of fire of the north wind.
This is why the first phase centred on the roof and the front elevation. “A key catalyst for this project”, says McCormack, “was the infiltration by wind, penetrating under roof tiles and bitumen-based roof felt and through fibreglass, frequently negating its insulation value. It also cut between the joists of the suspended floor and up between floor boards to further rob the house of its space heating.”

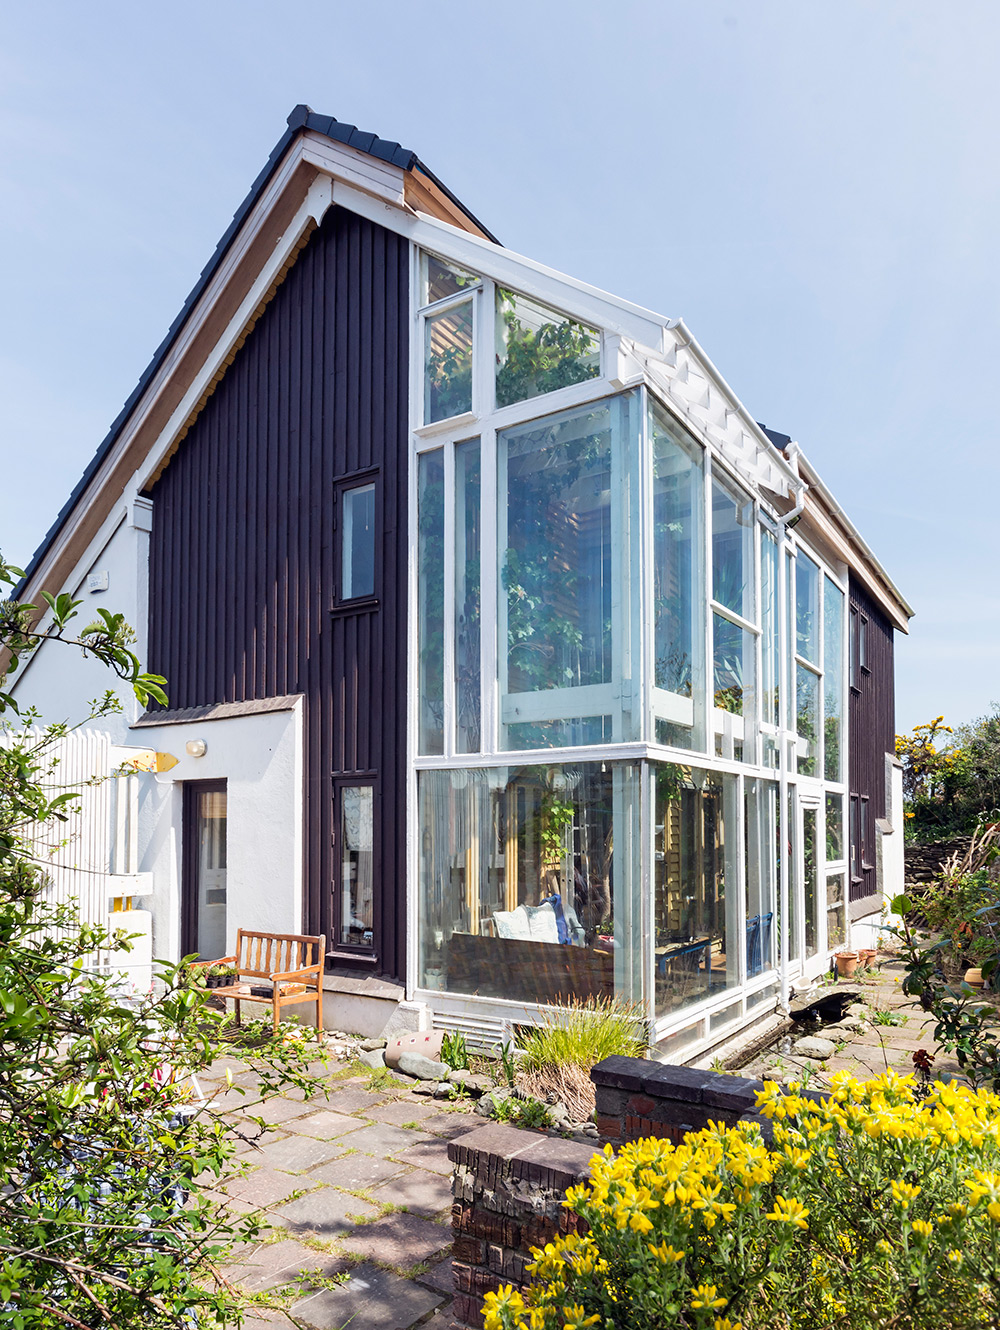
Photos showing how the original cottage was renovated and extended during the 1990s
The roof was stripped back and an airtight layer installed above the rafters, surmounted by two separate layers of Rockwool insulation. In addition, 100mm of mineral wool was installed between the rafters. The insulation, wind-tight and airtight layers were continued down to the verge overhang, where they now sit, awaiting the completion of external insulation on the gable walls at a later phase.
Hitting the pause button on a retrofit project throws up aesthetic issues too. If some elevations are left untouched, does this mean you get ugly overhangs that just can’t look good until the project is completed? What about windows? If you’re replacing windows now but not externally insulating until five years’ time, how do you position them so that you get optimal performance and a reasonable aesthetic between phases?
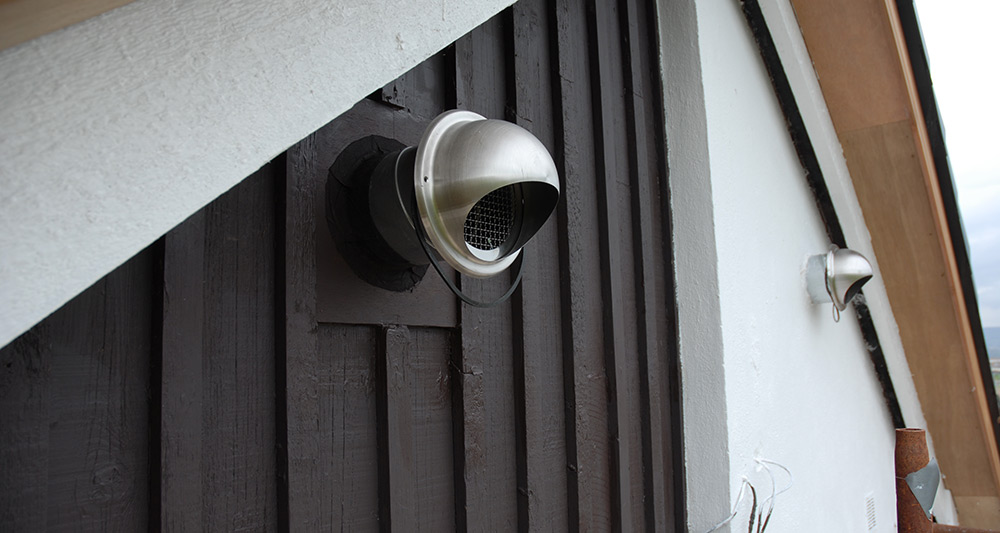
The external grilles for supply and extract vents for the heat recovery ventilation system
Moreira says that these are certainly challenges, but suggests that they’re really no different to the architectural challenges presented by any retrofit project. She points to a number of projects where these issues were handled in creative ways.
“There is a potential to look odd; one façade looks new but this other façade looks dull... our front façade has new windows and door and it looks very nice and sharp, then you look around and see the other façade unchanged...but you can work around this. It’s down to the architect to be clever and mitigate these issues,” she says.
There’s always a risk too that by the time you hit phase two, all of the great things you did in phase one will seem outdated and you will be niggled into revisiting work.
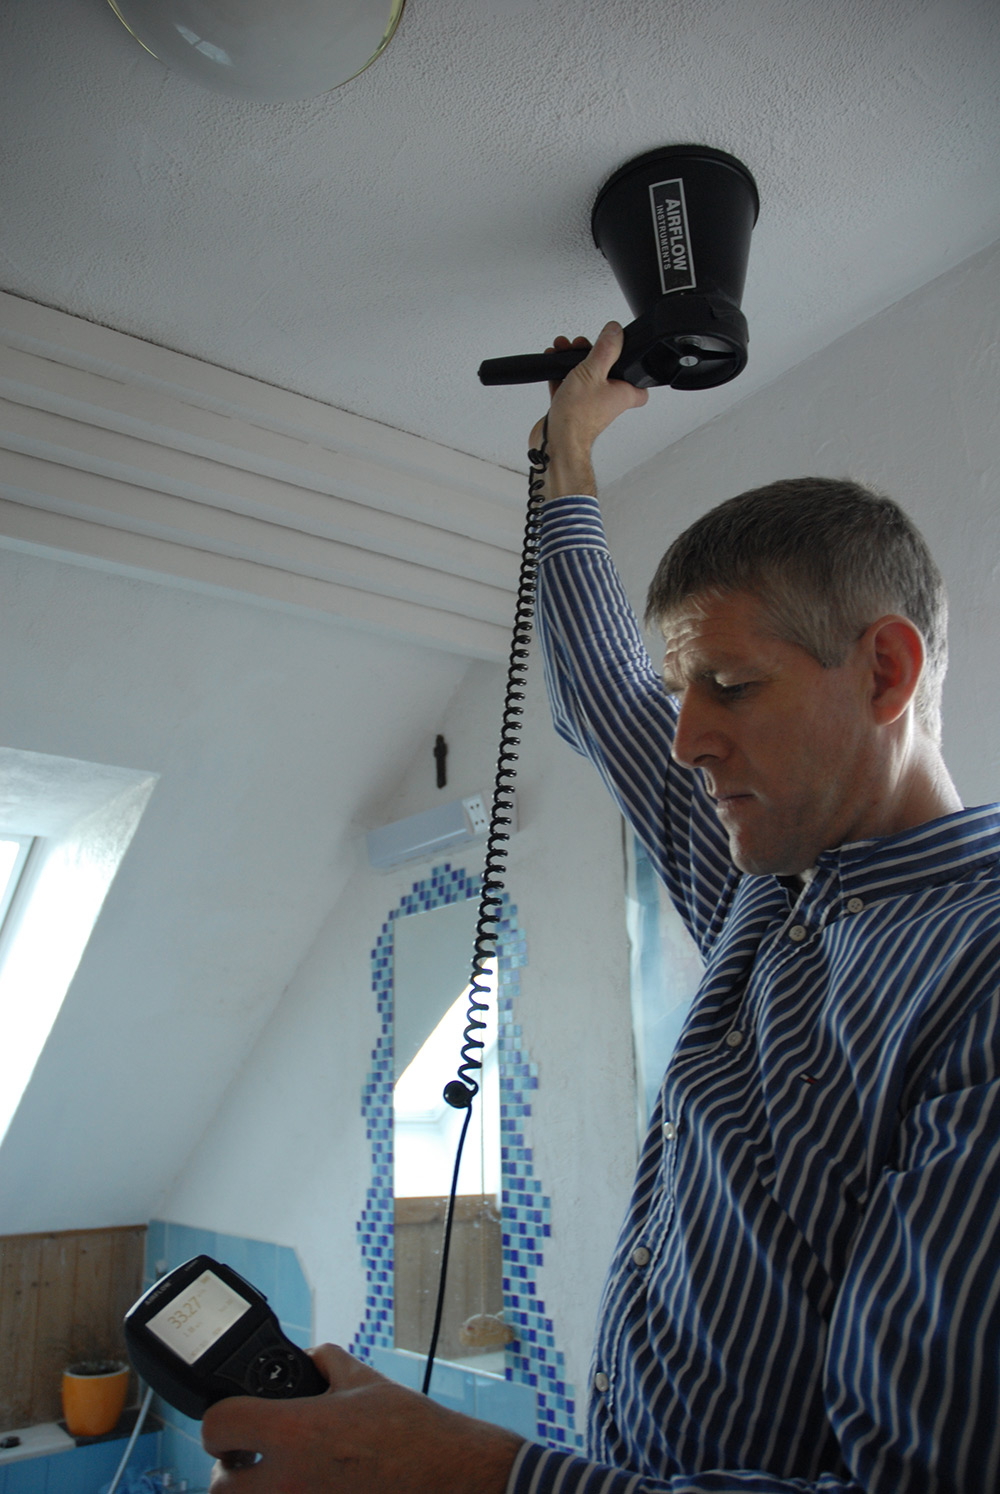
Ollie McPhillips commissioning the ventilation system
Beware, says Mariana Moreira, of the ‘lock-in’ effect. “That’s when you do the bare minimum, when you get non passive house certified windows or rooflights for example. To avoid that risk, you should really go for the best on the market at that moment.”
She points out too that this year’s passive house conference in Darmstadt saw a review of the performance of the first ever passive house built by PHI co-founder Dr. Wolfgang Feist 25 years ago. Despite the fact that all of the components used in that house are now well out of date, they continue to deliver excellent results and do not need replacing.
The house’s west façade — a remnant of the original cottage — includes an architectural feature that’s about as far away from passive house convention as possible: a scattering of glass blocks cut into the 215mm block construction when McCormack renovated and extended the house in the 1990s.
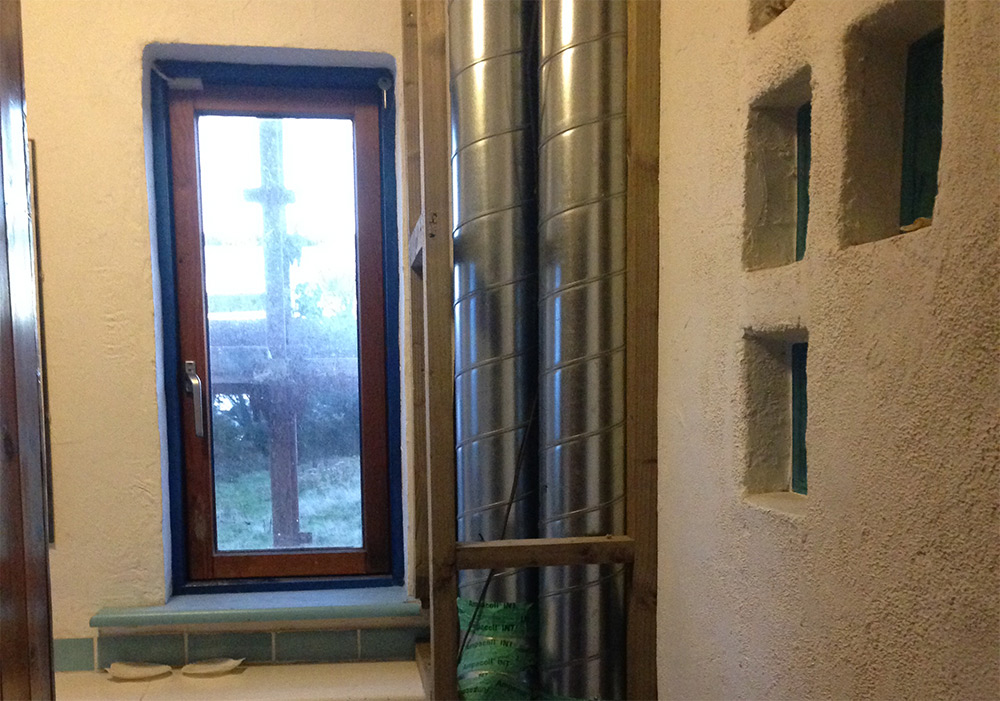
A section of the stainless steel spiral ductwork
Inspired by Le Corbusier’s chapel of Notre Dame du Haut, the blocks add an architectural flourish. “It’s as is if it’s water reflecting from the walls,” says Moreira. This wall wasn’t touched during the first phase of the Enerphit project, but as Moreira explains, it will be tackled when the remaining walls are externally insulated in the next phase.
“We will keep those glass blocks visible, so we’ll have to cut holes in the external insulation. We know it’s a weak point in the thermal envelope, and we have accounted for those heat losses in PHPP [the passive house design software], and it’s not affecting the result as it’s such a small area.,” she says.
“In Enerphit projects we have to be aware of these weak points and mitigate against them in terms of thermal bridging and condensation risk as much as possible, but existing building fabric has its own value and history.
It would be a pity to be narrow-minded, and to lose architectural features. The architectural integrity shouldn’t be compromised for the sake of thermal comfort. We have to aim for a solution that will respond to all such issues.”
Because the works to roof and front elevation were likely to increase the airtightness of the house substantially, it was decided to incorporate the MVHR system in the first phase. An airtightness measurement was carried out prior to the first phase works started, giving a result of 5.8 air changes per hour, at 50 Pascals of pressure. Once the first phase was completed the building was tested again, hitting a result of 2.4.
“It also made sense,” says McCormack, “to install the relatively heavy and bulky equipment within the thermal envelope in the attic during the roof retrofit construction, when access was particularly easy and more worker support was available.”
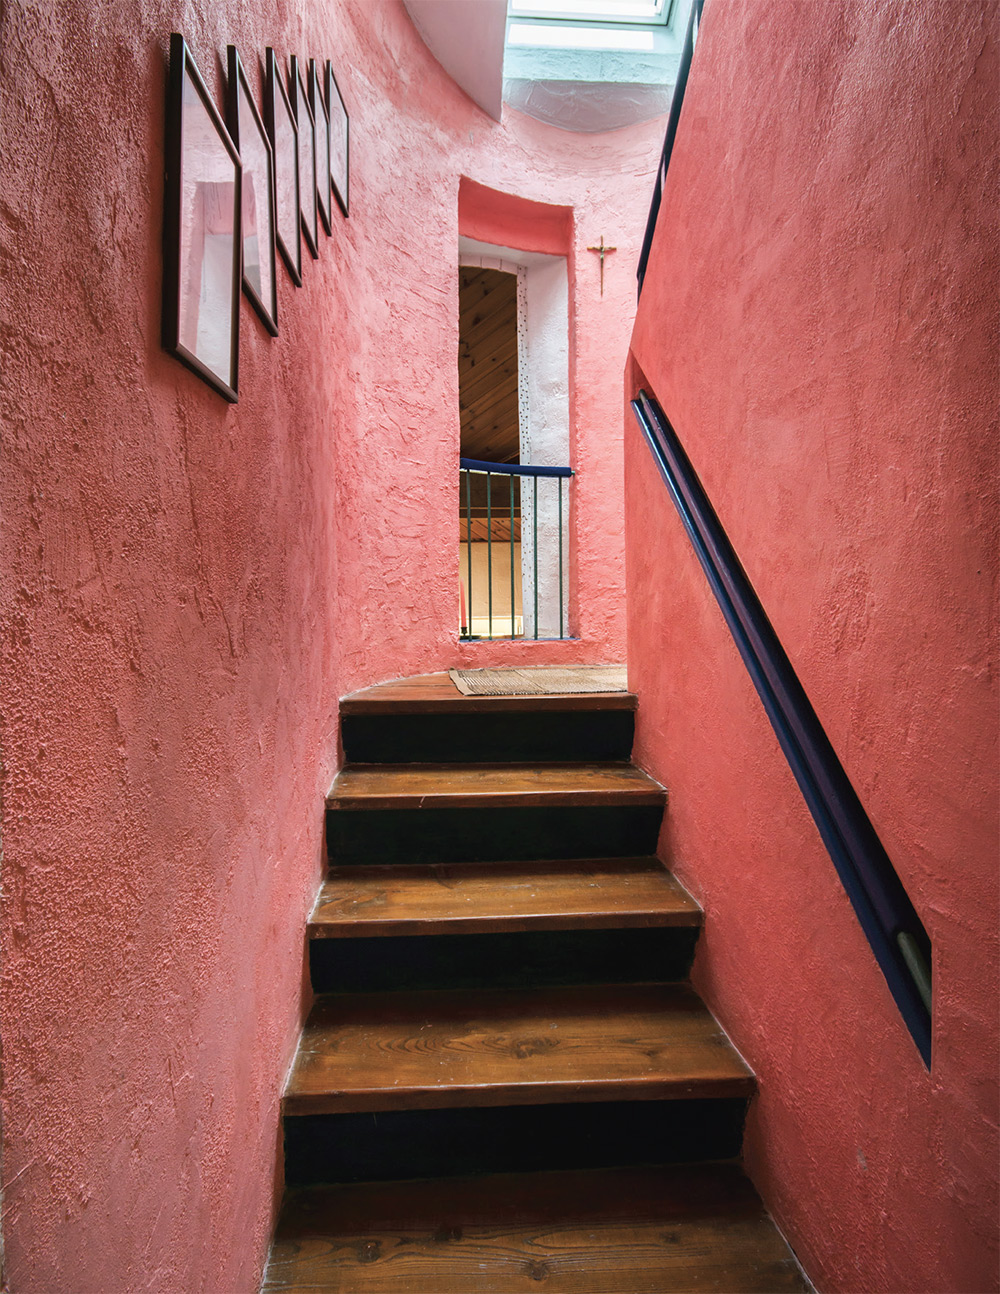
“I can see the north pole from here...or at least that’s what it feels like when the wind blows from the north.”
Because the machine faces the inside of an as-yet uninsulated external wall, some stripping away of this work is inevitable during the third phase in order to re-connect to the new attic gable wall fabric.
It is of course important that the house remain habitable throughout the three phases envisaged in the project, which is partly why most of the specified works are external.
“All the insulation is external,” says Moreira, “so there’s no mess inside the house. I know that sometimes interior works can’t be avoided but if it is possible, external works should be the solution.” Stripping back the roof from the outside allowed access to the rafters for the installation of both airtight membrane and insulation, obviating the need to come through the house. And as Moreira points out, installing the airtight membrane in this way made it easier to achieve airtight connections between roof and walls.
Staying with the roof, the design team ran into an unexpected issue which they believe is worth highlighting. The original roof build-up had envisaged full fill mineral wool between 175mm rafters, then the airtight layer above the rafters, topped off with 150mm rigid Rockwool boards.
“When we looked at it a bit more critically,” says Art McCormack, “we discovered that during the winter time, there was a modest risk of condensation build up. The safer option was to reduce the amount of wool on the inside to 100mm, then to add another 50mm of rigid board to the outside, giving us 200mm on the outside, and only 100m on the inside.”
The hygrothermal analysis which revealed this issue was carried out by Andrew Lundberg of passive house consultancy Passivate. The point, says McCormack, is to at least consider the hygrothermal risks in retrofit. “Don’t just presume that it’s ok to add loads of insulation inside the airtight layer in order to achieve a low U-value,” he says.
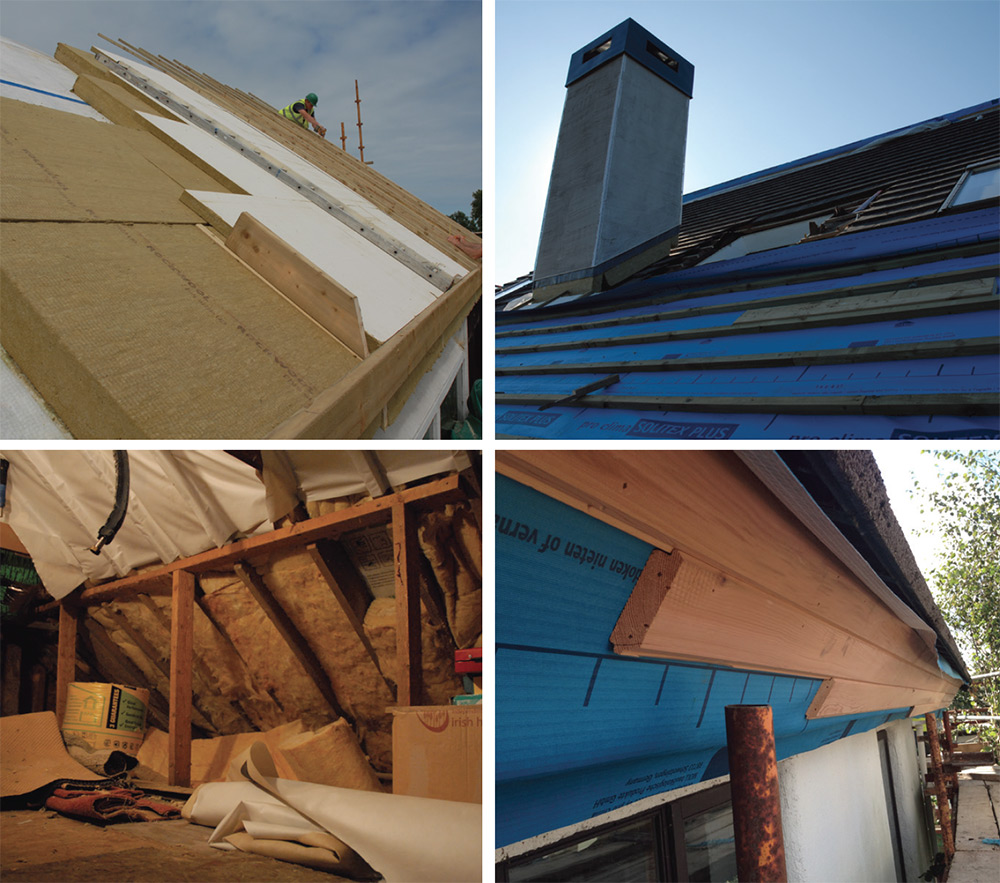
(Above) Insulation and airtightness details of the new roof build-up, including (bottom left) 100mm mineral wool installed between rafters; (middle left) two separate layers of Rockwool insulation outside existing rafters; (middle right) externally insulated chimney stack and Pro Clima Solitex Plus membrane over Rockwool insulation; (bottom right) airtight layers were continued down to the verge overhang, awaiting the completion of external insulation on the gable walls at a later phase
While the project aims to secure Enerphit certification once completed, the Passive House Institute is currently introducing a new endorsement initiative designed specifically for step-by-step retrofits. It will soon be possible to get a step-by-step Enerphit plan certified by the Passive House Institute once the first step has been completed.
“Then,” Moreira explains, “if you sell the house, the next owner will have that document, and he can continue to the second or third stage down the line. Then, at the end, when everything is done according to the standards criteria and step-by-step plan, the building can be certified.”
The first stage of the project has delivered massive improvements, bringing the house’s space heating demand down from 172.9 W/ m2K to 55.2 W/m2K, eliminating the drafts and dramatically improving comfort levels in the house.
“The quality of air is incredible,” says Mariana Moreira, “really amazing. I remember before, in the morning, you would feel the air very heavy from CO2 produced by our own exhalation, you would have to open the windows to bring in fresh air, but you just don’t need that anymore.”
Selected project details
Architect & energy consultants: MosArt Architects
Client: Art McCormack
Main contractor: Michael Bennett & Sons
Energy consultant: MosArt Architects
Mechanical contractor: Ollie McPhillips Ltd
Airtightness consultant: Passive House Academy
Thermal breaks: Partel
External insulation: Parex Lanko, via Tradecraft
Roof insulation: Rockwool/Isover Ireland
Wall insulation: Kingspan
Airtightness products: Ecological Building Systems / Partel
Windows: Internorm
Roof windows: Velux
Ventilation system: Paul, via Ollie McPhillips Ltd
Additional info
Building type: 140 square detached 1960 family home. Enerphit step-by-step refurbishment. First step complete during 2015, including roof refurbishment, roof lights replacement, front wall refurbishment, front windows and glazed door replacement, heat recovery ventilation installed and balanced.
Location: Wicklow Town, Co Wicklow
Completion date: First phase 2015, second phase 2017/18.
Budget: €100,000 for phase one
Enerphit certification: Overall refurbishment plan to be certified
SPACE HEATING DEMAND
Before: 192 kWh/m2/yr
After: 48 kWh/m2/yr
HEAT LOAD
Before: 59 W/m2
After: 22 W/m2
PRIMARY ENERGY DEMAND (PHPP)
Before: 362: kWh/m2/yr
After: 120 kWh/m2/yr
ENERGY BILLS
Before: €3,000 on home heating gas and electricity (June 09-June 10)
After: N/A yet
AIRTIGHTNESS (AT 50 PASCALS)
Before: 5.8 air changes per hour
After: 2.4 air changes per hour
WALLS
Before: 215mm rendered concrete block walls internally insulated with 50 mm fiberglass. U-value: 1.153 W/m2K
After (north facade): 250mm Platinum EPS insulation and silica render finish externally fixed on existing 215mm rendered concrete block walls, internally insulated with 50 mm fibreglass. U-value: 0.106 W/m2K
ROOF
Before: Roof insulated on the flat: Existing 175mm timber joists (44mm at 400 centres) insulated with 175 mm fibreglass. U-value: 0.264 W/m2K
Roof insulated on the slope: Existing 175mm timber rafters (44mm at 400 centres) insulated with fibreglass. Sealed 22 mm air gap between plasterboard and timber rafters. U-value: 0.250 W/m2K After: Roof insulation only on the slope (warm attic now part of the thermal envelope where the heat recovery ventilation is installed and first floor air ducting network is located). 100 mm mineral wool between existing 175 mm rafters (44mm at 400 centres), Pro Clima Intello airtight membrane above existing rafters, 150mm + 50 mm Rockwool insulation outside existing rafters and airtight membrane, Pro Clima Solitex Plus membrane over Rockwool insulation. U-value: 0.125 W/m2K
WINDOWS & DOORS
Before: double-glazed, timber windows and doors. Overall approximate U-value installed: 3.02 W/m2K New triple-glazed windows (to north façade): Internorm triple-glazed timber aluclad windows and doors. Overall U-value installed: 0.87 W/m2K
ROOF WINDOWS
Before: Double-glazed timber frame velux windows installed in 1990s. Overall approximate U-value installed: 3.02 W/m2K
After: Three plus two panes of glass with PVC frame, passive house certified Velux windows. Overall U-value installed: 0.70 W/m2K
HEATING SYSTEM
Before: Viessmann condensing gas boiler (efficiency over 90%). Evacuated tube solar thermal collector.
After: Same.
VENTILATION
Before: No ventilation system. Reliant on infiltration, chimney, wall vents (generally blocked) an
d opening of windows for air changes. After: Paul 300 heat recovery ventilation system — Passive House Institute certified to have effective heat recovery efficiency of 91.8%
Image gallery
https://passivehouseplus.co.uk/magazine/upgrade/wicklow-step-by-step-retrofit-reveals-new-way-to-go-passive#sigProIda2418b79a1


